Looking for a lush, even lawn that you’ll be proud to share with the neighbours? Turf removal and replacement is one of the quickest ways to completely transform your outdoor space. But… it has to be done properly. Right turf. Right ground preparation. Right time of year. Let’s take a closer look…
What’s covered in this guide:
- What Is Turf Removal and Replacement?
- Why Professional Turf Laying Makes All the Difference
- The Turf Removal and Replacement Process (Explained Step by Step)
- Choosing the Right Type of Turf
- When Should You Lay Turf?
- Cost of Turf Removal and Replacement
What Is Turf Removal and Replacement?
Stripping and replacing turf isn’t a complicated process. As the name suggests, your existing lawn is ripped up – weeds, old grass, and compacted soil, and all. The ground is prepared so the new turf has the best chance to root. New turf is laid on top to instantly transform your garden with an even surface that’s ready for use.
Here’s the snag. Most people who attempt this project at home miss the removal step. They lay new turf straight over old grass and guess what happens… the old turf prevents the new roots from bedding in and your beautiful lawn quickly turns yellow and patchy.
Ground preparation is everything here. Each stage of removal and replacement needs to be carried out with care and attention to detail if you want long-term, durable results. For that reason, a lot of people opt to hire turf layers to lay turf instead of doing it themselves. Removal and preparation is where most DIY turf projects run into problems.
Why Professional Turf Laying Makes All the Difference
Grab yourself a roll of turf, slice it to size and lay it on your lawn. Yeah… not quite. Rolling out turf is actually the easiest part of the entire process. To get great results that last for years, pros actually do a lot more than most homeowners realise. Here’s what’s involved:
- Rotovating the soil underneath to relieve compaction and add organic matter
- Bringing in and levelling topsoil to achieve correct depth for roots
- Compacting and raking the soil base to create a flat, even surface
- Laying boards down across the prep area so the turf isn’t walked on during installation
Skip any of the above and your turf won’t establish. You’ll soon end up with problems like poor drainage, surface rutting and dead patches that never grow. Fun fact: Aviva found that 21% of UK homeowners have already replaced their lawn or want to in the near future. Residential turf replacement is more common than you might think. With turf upgrades being so popular, doing it right the first time is more important than ever.
The Turf Removal and Replacement Process (Explained Step by Step)
Take a look at the step-by-step process that professionals follow when laying turf…
Step 1 – Remove Old Turf
Removing old turf involves getting rid of all the existing grass and weeds on your property. Notching around the edges and pulling it out by hand is common, but there are quicker ways.
One method is to use a turf stripper – basically a glorified weed extractor for lawns. Turf strippers dig into the ground quickly and remove the existing turf in one piece. Why spend so much time removing turf when you could be laying new stuff? Grass that’s already growing on your lawn will damage the new turf by:
- Consuming moisture and nutrients meant for new roots
- Preventing turf roots from settling into the soil
Step 2 – Prepare the Soil
Once your lawn is clear, it’s time to prep the soil. First up… rotovate the soil. Rotating helps loosen compacted ground and lets you mix in matter to improve drainage.
Next, you’ll want to get topsoil delivered and levelled. turfroots need room to grow. 15cm of topsoil is ideal, but you might need more or less depending on your lawn’s shape.
Step 3 – Level and Compact
Grab yourself a rake and get to work levelling the ground. Smooth out any bumps and sinkholes so your turf has an even surface to lay on. Once you’ve got it looking nice and flat, pass over it with a lawn compacter. A roller-style compacter works best but if you don’t have one, crouching down and jumping up works wonders. You’d be surprised how many turf jobs get ruined by skipping this step. Who knew an empty lawn could be so bumpy?!
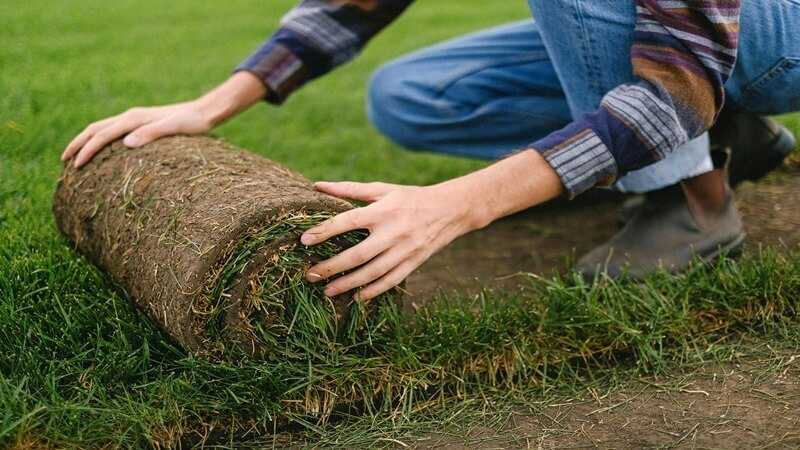
Step 4 – Lay Your Turf and Keep it Watered
Time to roll out that turf! If you’ve prepared the ground properly, laying turf is quick and easy. Make sure you’re working off boards so you don’t tread on the wet turf as it’s laid. Start from a straight edge and work across the rest of your garden.
After laying turf, keep it watered for up to 4 weeks. The roots need constant moisture to grow, so stop watering, and you’ll stop them growing too.
Choosing the Right Type of Turf
Your turf doesn’t come with instructions, obviously. When buying turf, there’s more than one kind to choose from. You’ll usually come across four main grades of turf when buying online or from local suppliers:
- Budget hardwearing turf – perfect for family gardens with lots of foot traffic
- Standard rye turf – great all round turf for most residential gardens
- Premium ornamental turf – best turf for show-off gardens that stand out
- Wildflower turf – ideal if you’ve got a patch of shade that nothing will grow
It all comes down to how you want your lawn to look and how much you want to spend. Your turf supplier should be able to recommend the right type for your garden.
When Should You Lay Turf?
Don’t turf too early or too late. Season plays a big part in turf replacement. For the best results, you should aim to replace your turf in either mid-autumn or early spring.
Laying turf in autumn is ideal. Not only do your feet beat up your lawn less, there’s usually more rain to keep the turf watered – something you’ll need to do for at least 4 weeks after installation. Spring is your next-best window. Turf should be watered more frequently in spring to account for rising temperatures.
You should avoid laying turf at these times…
- Winter – December, January and February. Too cold for turf to establish roots.
- Summer – June, July and August. Too hot for turf roots to grow.
Cost of Turf Removal and Replacement
Still thinking about turfing your garden? Don’t kid yourself – you know you want to. One thing people always ask is ‘how much will turf cost?’ Price will vary depending on the size of your garden and which type of turf you go for. Keep in mind that labour is around 20% more expensive if you live in London and the South East.
As a rough guide:
- Budget turf costs start at £2 per m²
- Premium turf will set you back £7+ per m²
- Professional installation should fall between £10 – £18 per m² including groundwork
For a typical 75m² garden, turf materials alone cost between £150 and £525 before labour is factored in. Getting quotes from at least three local turf layers and comparing their prices is the best way to find lawn installation near you.
Wrap-Up: How to Get a Perfect Lawn with Turf Laying
Putting down turf is one of the quickest ways to level-up your garden.
Here’s your quick recap…
- Always strip away old turf before laying new stuff
- Prepare, level and compact your lawn before laying turf
- Use the right turf for how you’ll be using your lawn
- Aim to lay turf in mid-autumn or wait until early spring
- Water frequently for the first month after turfing
- Get quotes from local turf installation pros
Ignore the above at your peril. Done properly, turf replacement gives you a lawn you’ll love… DIY it and you’ll soon see why most people pay professionals to lay turf.